Beaded Starfish
This beautiful beaded starfish will be a little bit of summer you can take with you where ever you go.

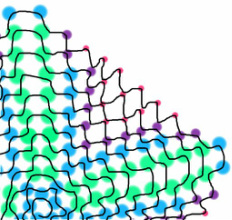
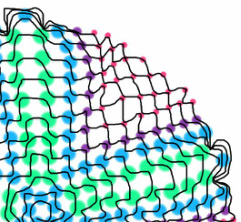
This will use 4 different sizes of seed beads. I recommend using 6/0, 8/0, 11/0, and 15/0. These are the easiest to find and have a really nice proportion. Also, you'll need a beading needle, super glue and thermally bonded beading thread in the color that most closely matches your beads. I really like Beadalon Wildfire because it never, never, never frays (haha, this is the point of thermally bonded thread, though). Usually, I can get away with using either white or black because you don't really see much of the thread. However, if you have light colored or translucent beads and dark thread, it'll stick out like a sore thumb. As far as the needle goes, the only read difference between a beading needle and a regular sewing needle is that the eye of a beading needle is thinner to fit through the smaller beads. If you have a sewing needle that will work, by all means use that. Test it out by threading the needle and pulling it through a 15/0 bead. If the bead pops, you'll know it won't work before you're fully invested in the design. For this tutorial, the green will represent 6/0, blue will be 8/0, pink is 11/0, and purple is 15/0. I'll apologize in advance: so sorry the lines are a bit wonky. This is my first tutorial, and I haven't perfected the MS Paint skills necessary :).
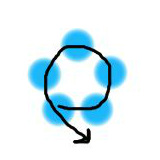
Begin by cutting a piece of thread about six feet long. I know, this seems ridiculously long, but you really will use most of this thread. Plus, it's better to have too much than not enough. Tying knots in beading thread is a serious pain in the ass. Thread five 8/0 beads on the thread while leaving about a six inch tail behind the first bead. Then push the needle back through the first bead in the same direction you already threaded it. This should give you a tight little circle of beads. If it doesn't look right, you might have gone through the first bead the wrong way. Take it out, and try the other direction.
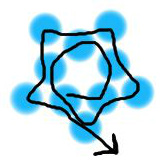
Next, add another 8/0 bead and go back through the next of the inner circle. Continue until you've added five more 8/0 beads. The pattern you're following will be new bead, back through old bead, new bead, back through old bead, etc...
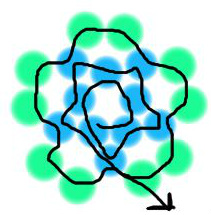
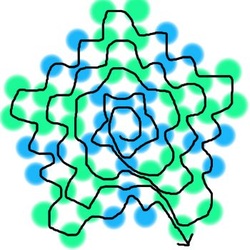
Now you get to start adding the 6/0 beads. Once you go back through the last of the second row, thread on two 6/0 beads. Then go back through the closest 8/0 bead. Continue in this pattern until you've finished this circle.
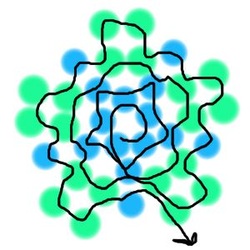
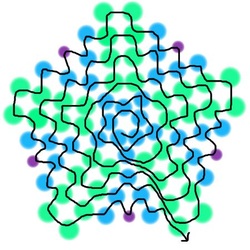
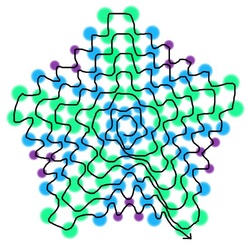
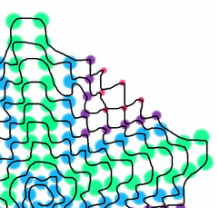
As you've probably figured out by now, this starfish is really just a wobbly spiral. Again, you're going to add on two more 6/0 beads, but this time come out of the last 6/0 bead, thread two new 6/0 beads, then go back into the other 6/0 bead. Essentially, you're building the legs of the starfish. Any other bead you put on (the 8/0s, 11/0s, and 15/0s) form the webbing between the legs. The easiest way to remember what bead goes where is that legs go out and webbing connects the legs.
The vast majority of the credit for this tutorial goes to this website:
http://salon-bisera.ru/content/skhema-morskoi-zvezdy-iz-bisera
This is where the original tutorial came from. Because it is in Russian, some of it does not translate well. I hope to make this beautiful seed beading pattern more accessible to those who speak English.
http://salon-bisera.ru/content/skhema-morskoi-zvezdy-iz-bisera
This is where the original tutorial came from. Because it is in Russian, some of it does not translate well. I hope to make this beautiful seed beading pattern more accessible to those who speak English.
